Overview
AI steps are natural-language instructions that tell Docket’s intelligent agent what to do or verify in your application.Unlike recorded steps, which replay recorded coordinates, AI steps use Docket’s vision and reasoning models to dynamically interpret your instructions and act accordingly. There are two main types of AI steps in Docket:
- AI Step – perform an action
- Assert – verify a condition
Getting Started: New to Docket? Start with Creating a Test to learn the basics.
AI Step
An AI Step tells Docket to perform an action in your application. You can write these in two styles depending on how explicit or goal-oriented you want to be.Explicit (Step-by-Step)
This style tells Docket exactly what to do, one action at a time. It’s ideal for debugging or when you need strict determinism. Example:- Click on the “Login” button. Click on the “Email” input field. Type “nishant@docketqa.com”. Click on the “Password” input field. Type “password123”. Click on the “Sign In” button.
- Predictable and repeatable
- Recorded steps are faster and more accurate in this case
- Can be verbose for longer flows
- May need updating after UI redesigns
Objective-Based
This style focuses on what you want to achieve rather than how to achieve it.It’s useful for dynamic interfaces, forms, or multi-step workflows that may change layout. Example:
- Login using “nishant@docketqa.com” and “password123”.
- Short and human-readable
- More resilient to UI changes
- Uses full page context and reasoning
- Less deterministic when multiple valid paths exist
- Can be harder to debug exact click paths
Special Capabilities
Certain actions — such as sending or checking emails and uploading files — can only be performed using AI steps. These actions require contextual reasoning and browser-level access that recorded steps don’t support. Examples:- Upload the file “contract.pdf” to the upload input on the page.
- Check the inbox for a verification code and enter it into the confirmation field.
@registration_email) to the current test run.
Assert Step
An Assert step tells Docket to verify that a condition holds true at the current state of your application.When you write an assertion, Docket takes a screenshot, analyzes the page using its vision model, and uses prior test history to understand context. The 5 most recent actions include their screenshots, while older actions are passed as text-only context. Examples:
- Assert that the dashboard shows at least 3 recent orders.
- Assert that a success message appears saying “Account created successfully.”
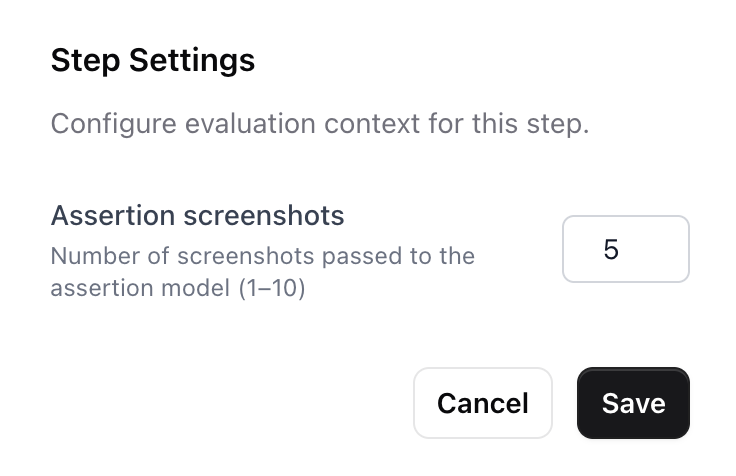
Assertion Screenshots (Lookback)
By default, Docket passes the last 5 screenshots to the assertion model, giving it context about what happened in preceding steps. You can configure this value between 1 and 10 per step. To adjust this, click the gear icon on any assert or AI step. The icon turns blue when the value differs from the default.
Writing Good Assertions
Well-written assertions make your tests reliable and meaningful. Poorly defined ones can make results ambiguous.Follow these guidelines for clarity and precision:
| Problem | Bad Example | Improved Example |
|---|---|---|
Missing assert keyword | Look for search results on the main body | Assert that there are search results displayed on the main body |
| Ambiguous goal | Assert that results are correct | Assert that search results are sorted by date |
| Unverifiable statement | Assert that the page looks good | Assert that no text in the table overflows its cell |
| Too precise for minor details | Assert that the divider color is #ff5733 | Assert that the divider appears red |
| Time-based check | Assert that the video plays a 10-second ad | Avoid timing-based assertions |
Note
Writing words likeverify,check,ensure,assertorvalidateduring an AI step may also result in an assertion action. but we recommend using explicitassertactions for consistency and accuracy.
Early Termination
Docket can mark a test as failed without completing the entire flow if, during self heal or AI steps, it detects usability issues that would frustrate a real user. The agent will fail the test early if it encounters:- The feature is not easily findable and requires navigating through multiple menus or sections
- The interface uses non-standard or unintuitive patterns
- The task takes significantly more steps or retries than expected
- There are visible errors, missing features, or unresponsive UI elements
- The interface is confusing due to unclear labeling, layout, or navigation
- The tester is unsure how to proceed because the next step isn’t obvious or discoverable
Tip: This behavior ensures Docket catches not just broken functionality, but also poor user experiences that could lead to user frustration or abandonment.
Testing AI Steps in the Remote Screen
When working with AI steps during test creation, you can test them in real-time using the remote screen. Simply write an AI step and click the play button next to it while the remote screen is running. Docket will execute that step immediately, allowing you to:- Verify the step works as expected
- See the agent’s reasoning in real-time
- Iterate quickly on your test instructions
- Observe how the agent interprets your natural language commands
Combining Cached and AI Steps
You can combine recorded steps and AI steps to achieve a balance of precision and flexibility.| Use Case | Recommended Step |
|---|---|
| Deterministic clicks or scrolls | Recorded Step |
| Dynamic workflows or variable layouts | AI Step |
| Page validations or checks | Assert Step |
| File uploads or email actions | AI Step |
- [Recorded Step] Click “Sign In”
- [AI Step] Login using “nishant@docketqa.com” and “password123”
- [Assert Step] Assert that the dashboard loads successfully
Important: Page State After AI Steps
When using AI steps followed by recorded steps, it’s critical to consider where your AI step will leave the page once complete. Recorded steps rely on specific screen coordinates, so if an AI step ends on an unexpected page state, scroll position, or modal, subsequent recorded actions may fail or become flaky. Best Practices:- Be explicit about the final state in your AI step (e.g., “Login and ensure you’re on the dashboard”)
- Verify the page has fully loaded before transitioning to recorded steps
- If using modals or overlays, explicitly close them in the AI step if recorded steps follow
- Consider adding a brief assertion to confirm the expected page state before recorded steps execute
Learn more: See Recorded Steps to understand how coordinate-based actions work and when to use them.